Setting up your development environment
To use the CommandAPI in your plugins, there are a few methods of adding it to your development environment. First things first, if you're using the CommandAPI plugin, you need to add the CommandAPI has a dependent in your plugin.yml:
name: MyPlugin
main: some.package.name.Main
version: 1.0
depend: [CommandAPI]
Using Maven (recommended)
Developer's Note:
If you've never used maven before, I highly recommend it! It makes it easier to keep your code updated with the latest dependency updates. For information on how to set up a plugin using maven, you can read Bukkit's plugin tutorial.
-
Add the dependency to your
pom.xml:<dependencies> <dependency> <groupId>dev.jorel</groupId> <artifactId>commandapi-bukkit-core</artifactId> <version>9.1.0</version> <scope>provided</scope> </dependency> </dependencies>
Using Gradle (recommended)
-
Add the repositories to your
build.gradlefile (the second repository is required because the CommandAPI depends on the NBT-API):repositories { mavenCentral() maven { url = "https://repo.codemc.org/repository/maven-public/" } } -
Add the dependency to your list of dependencies in your
build.gradlefile:dependencies { compileOnly "dev.jorel:commandapi-bukkit-core:9.1.0" }
Manually using the .jar
-
Download the latest CommandAPI.jar from the download page here
-
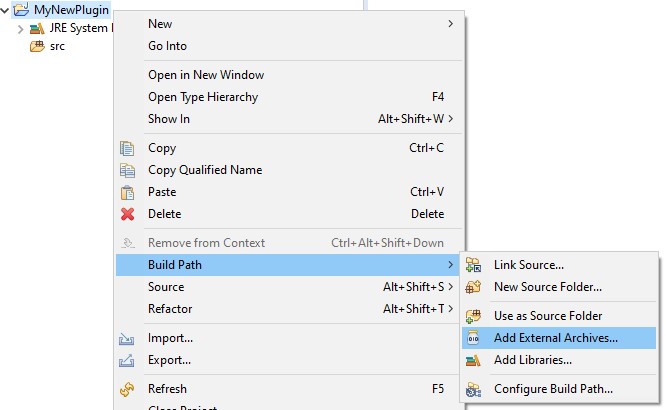
Add the CommandAPI.jar file to your project/environment's build path:
-
Adding the external .jar file in Eclipse:

-
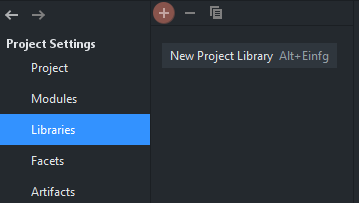
Adding the external .jar file in IntelliJ:
-
In your project, first click
File->Project Structure->Libraries -
Next, click the little
+at the top:
-
After you clicked that, you need to select
Java. A little pop-up will appear where you can choose the location of your external .jar file.
-
-